 |
 |
If you have ever tried to solve a Rubik’s cube, then you know that it can seem like an impossible task. Peeling off the stickers and putting them back on without damaging them is hard work.
Like any problem, your cube can be solved by breaking down the process into steps. Solving your cube is more about understanding and recognizing patterns, than it is about actually arranging the colours. As you proceed you will see that only key colours and patterns are important and the other colours are ignored completely.
Chances are you will probably mess up one of the steps along the way and have to start over. Although frustrating, this is completely normal. Fear not, as you learn from your mistakes you will eventually solve the problem.
|
|
 |
|
|
 |
 |
The six sides or faces of the cube are represented by the letters U for UP face, D for DOWN face, F for FRONT,
R for RIGHT, L for LEFT and B for BACK face, as per the diagram below. The letters represent the orientation of the cube, and not the colours of the sides. For example, while holding the cube with White on top and Red facing you, Red would be F, Blue R, Green L, Orange B. Now if you turned the cube so green was facing you, now Green would be F, Red R, Blue B, Orange L, etc. For our example we will use White as UP to start off with. |
|
 |
|
 |
|
|
|
|
|
|
|
|
 |
 |
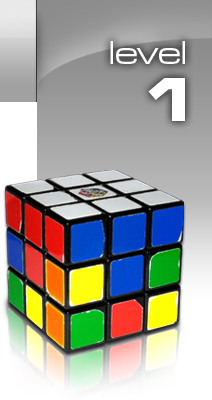
The objective in Level 1 is to properly orient all pieces of the first layer. Once completed your cube should look like this.
This step will get a lot easier over time the more familiar you become with completing your cube. |
|
 |
|
|
 |
 |
 |
| In this step you want to create a cross on the top layer, with the edge pieces matching their colours respective center piece. When you have a top cross and edges matching, proceed to Step 2. |
|
 |
|
 |
|
|
|
 |
 |
 |
| Now you want to place all the white corner pieces in their correct locations and orientation. Find a white corner piece and arrange it directly below its proper location and follow fig. 2.1, 2.2 or 2.3. If the piece is already in the correct location but its orientation is wrong (see fig. 2.4), the piece must first be removed and then placed correctly. If the piece is in the wrong spot, follow removal instructions. |
|
 |
|
 |
 |
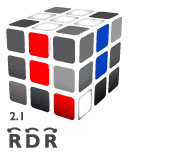 |
 |
Align the corner piece under its corresponding corner location |
|
|
 |
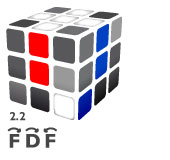 |
 |
Align the corner piece under its corresponding corner location |
|
|

|
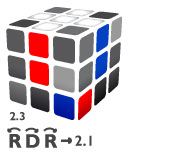 |
 |
This will flip the piece to the correct orientation, then repeat either Fig 2.1 or 2.2 |
|
|
 |
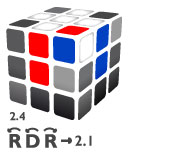 |
 |
This will romove the piece if it is in the correct location but wrong orientation, then repeat either Fig 21. or 2.2 |
|
|
 |
|
|
|
|
 |
 |
 |
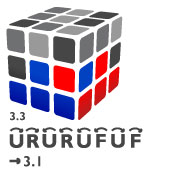
| In this step you want to position the edge piece above its corresponding colour creating an upside down T pattern. There are only two algorithms needed for this step and they are mirrors of each other. If the piece is already in the correct location but its orientation is wrong (see fig. 3.3), the piece must first be removed and then placed. |
|
 |
|
 |
 |
|
 |
|

|
 |
 |
This will remove the piece so that it can be placed correctly using Fig 3.1 or 3.2 |
|
|
 |
|
|
 |
 |
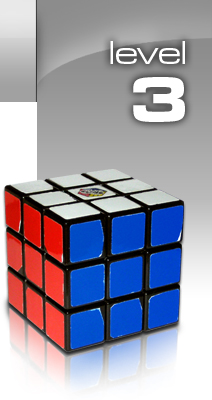
In this level you will complete your cube and gain your bragging rights. There are a few steps in this level. First you want to create a cross, arrange and orient corner pieces, and finally orient and arrange edge pieces. Remember, solving your cube is all about pattern recognition and if done correctly, there are only a few patterns available after each step. Although this level may seem like a lot, there are really only 4 main algorithms required; all other algorithms are either mirrors or only slightly changed.
During some of the steps in this level your cube may look in disarray. But fear not, if you follow the algorithms correctly your cube will turn back to normal. If you are lucky, well really by random chance, you may get to skip one or several of the level 3 steps.
|
|
 |
|
|
 |
 |
 |
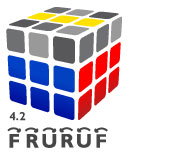
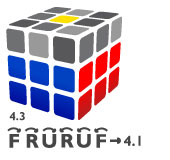
| In this step you want to create a yellow cross. Don’t worry about the colour, location or orientation of any other layer 3 pieces. If you look at your cube you will have one of three patterns: An L shape, a line, or a dot in the center. If you have the center dot you will have to make an L shape or line (see Fig. 4.3). Remember you are only looking for the pattern, all other pieces are irrelevant. If you already have a yellow cross, proceed to Step 5. |
|
 |
|
 |
 |
 |
 |
Use this if you have and L shape |
|
|
 |
 |
 |
Use this if you have a line. |
|
|

|
 |
 |
This will produce an L shape, then follow Fig 4.1 |
|
|
 |
|
|
|
 |
 |
 |
| Now that you have a cross you want to arrange all the 3rd layer corner pieces into their respective locations, however, they will not need to be in the correct orientation. We will orient them correctly in the next step. There are only 2 options at this point: Either all 4 will be in the wrong locations (Fig 5.2), or only 2 will need to be switched (Fig 5.1). You now want to turn the top layer and try and match up any corner locations. If Fig 5.2 algorithm seems too long, you can simply follow Fig 5.1 twice. |
|
 |
|
 |
|
|
|
 |
 |
 |
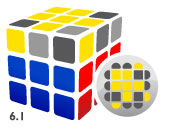
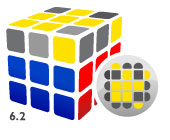
| In this Step and in Step 7, you will only use one algorithm or its mirror. The key is the orientation of the pattern before you start the algorithm. Your cube should now have one of 7 patterns. If your cube looks like the patterns in Fig. 6.1 or 6.2, proceed to Step 7. If you have one of the five patterns in Fig 6.3 to 6.7, you will have to complete the algorithm to get to pattern 6.1 or 6.2. |
|
 |
|
 |
 |
 |
 |
If you have this pattern, proceed to Step 7 |
|
|
 |
 |
 |
If you have this pattern, proceed to Step 7 |
|
|

| |
 |
|
 |
|
 |
|
 |
|
 |
|
|
|
 |
 |
 |
| You now have a top cross with one corner oriented correctly. Complete the appropriate algorithm to turn all corners to the proper orientation. |
|
 |
|
 |
|
|
|
 |
 |
 |
| You’re almost done. All you need now is to move the edge pieces into their correct locations. This is one algorithm either done once or twice with one step changed; you will turn counter or clock wise depending on which way you want to rotate the pieces. This is also the only algorithm where you will need to move the back side. Remember to turn the backside clockwise and counterclockwise as if you were looking at it face on. You don’t want to mess up now that you are soooo close. |
|
 |
|
 |
|
|
|
